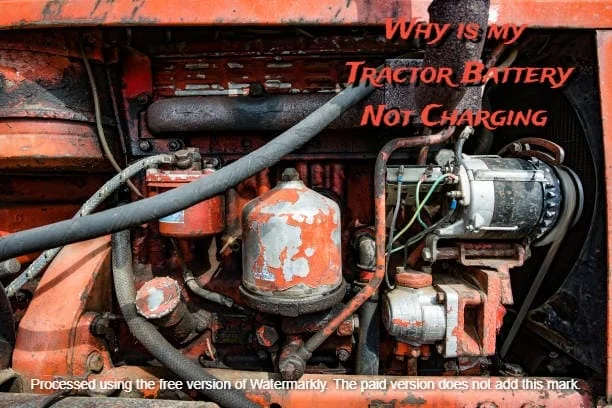
Why is my Tractor Battery Not Charging
A tractor battery not charging can be due to various issues, including a faulty alternator, corroded battery terminals, loose connections, or a failing battery. It’s essential to inspect these components to identify and fix the problem.
Introduction
Tractors are essential equipment for farmers, landscapers, and hobbyists alike. These powerful machines rely heavily on their electrical systems, with the battery playing a crucial role in starting the engine and powering various components. However, a common issue that many tractor owners face is a battery that refuses to charge. This can be frustrating and potentially costly if not addressed promptly.
In this comprehensive guide, we’ll explore the various reasons why your tractor battery might not be charging, how to diagnose the problem, and what steps you can take to resolve it. We’ll cover everything from simple maintenance tasks to more complex electrical system issues, providing you with the knowledge and tools to keep your tractor running smoothly.
Whether you’re a seasoned mechanic or a novice tractor owner, this article will help you understand the intricacies of tractor battery charging systems and empower you to tackle charging problems head-on. Let’s dive into the world of tractor batteries and uncover the secrets to maintaining a healthy electrical system for your trusty workhorse.

Understanding Tractor Battery Basics
Before we delve into the reasons why your tractor battery might not be charging, it’s essential to understand the basics of how tractor batteries work and their role in the overall electrical system.
What is a Tractor Battery?
A tractor battery is a rechargeable lead-acid battery designed to provide the initial surge of electricity needed to start the tractor’s engine. It also supplies power to various electrical components when the engine is not running. Tractor batteries are typically 12-volt systems, although some older models may use 6-volt batteries.
How Does a Tractor Battery Charge?
When the tractor’s engine is running, the alternator or generator produces electricity to recharge the battery and power the tractor’s electrical systems. This charging process is regulated by a voltage regulator, which ensures that the battery receives the correct amount of charge without overcharging.
Key Components of a Tractor’s Charging System
- Battery
- Alternator or generator
- Voltage regulator
- Battery cables and connections
- Fuses and fusible links
Understanding these components and their functions is crucial for diagnosing and resolving charging issues.
Common Reasons for Tractor Battery Charging Issues
There are several reasons why your tractor battery might not be charging properly. Let’s explore some of the most common culprits:
1. Faulty Alternator or Generator
The alternator or generator is responsible for producing the electricity needed to charge the battery. If it’s not functioning correctly, the battery won’t receive the necessary charge. Signs of a faulty alternator include:
- Dimming headlights
- Battery warning light on the dashboard
- Unusual noises coming from the alternator
- Frequent battery drainage
2. Worn or Loose Drive Belt
The alternator is typically driven by a belt connected to the engine. If this belt is worn, loose, or damaged, it may not turn the alternator effectively, resulting in insufficient charging. Look for:
- Visible cracks or fraying on the belt
- Squealing noises when the engine is running
- Belt slippage or visible looseness
3. Corroded or Loose Battery Connections
Corrosion on battery terminals or loose connections can impede the flow of electricity, preventing the battery from charging properly. Check for:
- White, green, or blue powdery substance on the battery terminals
- Loose or damaged battery cables
- Visible damage to the battery posts
4. Faulty Voltage Regulator
The voltage regulator controls the amount of charge flowing to the battery. If it’s malfunctioning, it may not allow enough charge to reach the battery or could potentially overcharge it. Symptoms include:
- Overcharged battery (boiling electrolyte)
- Undercharged battery despite a functioning alternator
- Inconsistent voltage readings
5. Damaged or Faulty Wiring
Electrical issues in the tractor’s wiring can prevent the charging system from functioning correctly. Look for:
- Frayed or exposed wires
- Loose connections in the wiring harness
- Signs of rodent damage to wiring
6. Dead or Failing Battery Cells
Sometimes, the problem lies within the battery itself. One or more dead cells can prevent the battery from holding a charge. Signs of a failing battery include:
- Slow engine cranking
- Swollen battery case
- Low electrolyte levels (in non-sealed batteries)
- Battery more than 3-5 years old
7. Parasitic Draw
A parasitic draw occurs when electrical components continue to drain the battery even when the tractor is turned off. This can be caused by:
- Faulty switches or relays
- Malfunctioning accessories
- Electrical short circuits
Understanding these common issues will help you narrow down the potential causes of your tractor’s battery charging problems.

Diagnosing the Problem
To effectively address your tractor’s battery charging issues, it’s crucial to accurately diagnose the problem. Here’s a step-by-step guide to help you identify the root cause:
Visual Inspection
Start with a thorough visual inspection of your tractor’s electrical system:
- Check the battery for signs of damage, corrosion, or leakage.
- Inspect the alternator belt for wear, proper tension, and alignment.
- Examine all visible wiring for signs of damage or loose connections.
- Look for any signs of rodent damage or nests near the electrical components.
Battery Testing
Next, test the battery to determine its condition:
1. Voltage Test
Use a multimeter to measure the battery’s voltage:
- A fully charged 12-volt battery should read between 12.6 and 12.8 volts.
- If the voltage is below 12.4 volts, the battery is undercharged.
2. Load Test
A load test checks the battery’s ability to hold a charge under load:
- Connect a load tester to the battery.
- Apply a load equal to half the battery’s cold cranking amp (CCA) rating for 15 seconds.
- Check the voltage:
- If it stays above 9.6 volts, the battery is good.
- If it drops below 9.6 volts, the battery may need replacement.
3. Hydrometer Test (for non-sealed batteries)
For batteries with removable caps, a hydrometer can measure the specific gravity of the electrolyte:
- A reading between 1.265 and 1.299 indicates a fully charged cell.
- Lower readings suggest the cell is discharged or failing.
Charging System Test
To check if the charging system is working correctly:
- Start the tractor engine.
- Use a multimeter to measure the voltage across the battery terminals:
- The voltage should increase to between 13.8 and 14.4 volts.
- If it doesn’t increase, there may be an issue with the alternator or voltage regulator.
Alternator Output Test
To test the alternator’s output:
- With the engine running, disconnect the positive battery cable.
- If the engine stops immediately, the alternator is not producing power.
- If the engine continues to run, the alternator is functioning, but there may be issues with the voltage regulator or wiring.
Caution: This test can potentially damage modern electrical systems. It’s best performed by a professional or on older tractors without sensitive electronics.
Parasitic Draw Test
To check for a parasitic draw:
- Disconnect the negative battery cable.
- Connect an ammeter between the negative battery post and the disconnected cable.
- Wait for all electrical systems to shut down (usually about 30 minutes).
- Check the current draw:
- A draw of 50 milliamps or less is generally acceptable.
- Higher draws indicate a potential parasitic drain issue.
By following these diagnostic steps, you can pinpoint the likely cause of your tractor’s battery charging problems and take appropriate action to resolve the issue.
Troubleshooting Steps
Once you’ve diagnosed the potential cause of your tractor’s battery charging issues, it’s time to take action. Here are detailed troubleshooting steps for the most common problems:
Cleaning Corroded Battery Terminals
If you’ve identified corrosion on the battery terminals, follow these steps to clean them:
- Disconnect the battery cables, starting with the negative (-) terminal.
- Mix a paste of baking soda and water.
- Apply the paste to the corroded areas using a wire brush.
- Scrub the terminals and cable ends thoroughly.
- Rinse with clean water and dry completely.
- Apply a thin layer of dielectric grease to the terminals.
- Reconnect the cables, starting with the positive (+) terminal.
Tightening Loose Connections
Loose connections can cause intermittent charging issues. To address this:
- Check all battery cable connections, both at the battery and where they connect to the tractor’s frame or engine.
- Use the appropriate size wrench to tighten any loose connections.
- Be careful not to overtighten, as this can damage the battery posts.
Replacing the Alternator Belt
If the alternator belt is worn or loose, replace it following these steps:
- Consult your tractor’s manual for the correct belt size and routing diagram.
- Loosen the alternator mounting bolts.
- Release the belt tension and remove the old belt.
- Install the new belt, following the routing diagram.
- Tension the belt according to the manufacturer’s specifications.
- Tighten the alternator mounting bolts.
- Start the engine and check for proper belt operation.
Testing and Replacing the Voltage Regulator
To test and replace the voltage regulator:
- Locate the voltage regulator (often mounted on or near the alternator).
- Use a multimeter to test the regulator’s output voltage with the engine running.
- If the voltage is outside the 13.8-14.4 volt range, the regulator may need replacement.
- Disconnect the battery and remove the old regulator.
- Install the new regulator, ensuring all connections are secure.
- Reconnect the battery and test the charging system.
Addressing Wiring Issues
For damaged or faulty wiring:
- Visually inspect all accessible wiring for signs of damage.
- Replace any frayed or damaged wires.
- Use electrical tape or heat shrink tubing to insulate exposed wires.
- Check and tighten all electrical connections in the charging system.
- If you suspect rodent damage, consider installing protective measures like wire loom or rodent deterrents.
Replacing a Dead Battery
If your battery is beyond repair:
- Choose a replacement battery with the correct size, voltage, and cold cranking amps (CCA) for your tractor model.
- Disconnect and remove the old battery, starting with the negative (-) terminal.
- Clean the battery tray and cable ends.
- Install the new battery, connecting the positive (+) terminal first.
- Apply terminal protector spray to prevent future corrosion.
- Properly dispose of the old battery at a recycling center.
Resolving Parasitic Draw Issues
To address a parasitic draw:
- Disconnect electrical components one at a time while monitoring the ammeter.
- When the draw drops significantly, you’ve likely found the culprit.
- Check that component for shorts or malfunctions.
- Repair or replace the faulty component as necessary.
- If you can’t locate the source, consider seeking professional help to trace the electrical issue.
By following these troubleshooting steps, you can address many common tractor battery charging issues. Remember to always prioritize safety when working with electrical systems, and don’t hesitate to seek professional assistance for complex problems.

Preventive Maintenance
Preventing battery charging issues is often easier and more cost-effective than fixing them. By implementing a regular maintenance routine, you can extend the life of your tractor’s battery and charging system. Here are some key preventive maintenance tasks:
Regular Battery Checks
Perform these checks monthly or before extended periods of use:
- Visual Inspection: Look for signs of damage, corrosion, or leakage.
- Clean Terminals: Remove any corrosion buildup and apply terminal protector.
- Check Electrolyte Levels: For non-sealed batteries, ensure electrolyte covers the plates.
- Tighten Connections: Ensure all battery connections are snug but not overtightened.
Proper Storage Practices
When storing your tractor for extended periods:
- Clean the Battery: Remove any dirt or debris that could lead to discharge.
- Disconnect the Negative Terminal: This prevents parasitic draw during storage.
- Use a Battery Maintainer: A trickle charger can keep the battery charged without overcharging.
- Store in a Cool, Dry Place: Extreme temperatures can damage the battery.
Regular Charging System Checks
Periodically inspect and maintain the charging system:
- Check Belt Tension: Ensure the alternator belt is properly tensioned.
- Inspect Wiring: Look for signs of wear, damage, or loose connections.
- Test Alternator Output: Use a multimeter to verify proper charging voltage.
- Clean Alternator: Remove dust and debris that can affect cooling and performance.
Proper Operating Practices
How you use your tractor can impact battery life:
- Avoid Short Trips: Short runs don’t allow the battery to fully recharge.
- Turn Off Accessories: When not in use, switch off lights and other electrical components.
- Regular Use: Start and run the tractor periodically during long storage periods.
- Proper Shutdown: Always turn off all accessories before shutting down the engine.
Scheduled Maintenance
Create a maintenance schedule that includes:
- Annual Battery Testing: Perform a load test to assess battery health.
- Alternator Belt Replacement: Replace the belt according to manufacturer recommendations.
- Electrical System Inspection: Have a professional check the entire electrical system annually.
Battery Electrolyte Maintenance
For batteries with removable caps:
- Check Levels Monthly: Maintain proper electrolyte levels with distilled water.
- Avoid Overfilling: Fill only to the indicated level to prevent overflow during charging.
- Use Proper Water: Only use distilled water to prevent mineral buildup.
Environmental Considerations
Protect your tractor and battery from environmental factors:
- Use Battery Insulation: In extreme climates, insulate the battery to protect from temperature fluctuations.
- Protect from Elements: If possible, store the tractor in a covered area.
- Clean After Use: Remove mud, dust, and debris that can lead to electrical issues.
By implementing these preventive maintenance practices, you can significantly reduce the likelihood of battery charging issues and extend the life of your tractor’s electrical system. Regular care and attention will keep your tractor running smoothly and reliably, saving you time and money in the long run.
When to Seek Professional Help
While many tractor battery charging issues can be resolved through DIY troubleshooting and maintenance, there are situations where it’s best to seek professional assistance. Here are some scenarios when you should consider consulting a qualified tractor mechanic or electrician:
Complex Electrical Issues
If you’ve gone through basic troubleshooting steps and still can’t identify the problem, it may indicate a more complex electrical issue. Professional technicians have specialized diagnostic tools and expertise to pinpoint elusive electrical faults.
Safety Concerns
Working with high-voltage electrical systems can be dangerous. If you’re unsure about any aspect of diagnosing or repairing your tractor’s charging system, it’s safer to let a professional handle it.
Warranty Considerations
If your tractor is still under warranty, attempting repairs yourself might void the warranty. Always check your warranty terms before performing any significant maintenance or repairs.
Lack of Proper Tools
Some diagnostic and repair procedures require specialized tools that you may not have. Professional shops are equipped with the necessary tools to properly diagnose and fix charging system issues.
Alternator Rebuilding or Replacement
If your alternator needs rebuilding or replacement, this is often best left to professionals who have the expertise and equipment to ensure proper installation and function.
Certainly. I’ll continue with the article, picking up where we left off:
Persistent Parasitic Draw
If you’ve identified a parasitic draw but can’t locate the source, a professional can use advanced diagnostic tools to trace the electrical circuits and identify the problem component.
Computer-Controlled Systems
Modern tractors often have complex computer-controlled electrical systems. Diagnosing and repairing these systems may require specialized knowledge and equipment that only professionals possess.
Time Constraints
If you rely on your tractor for time-sensitive work, it may be more efficient to have a professional diagnose and repair the issue quickly rather than spending time on trial-and-error troubleshooting.
Recurring Issues
If you’ve addressed a charging problem but it keeps recurring, there may be an underlying issue that requires professional diagnosis and repair.
Battery Replacement in Complex Systems
Some modern tractors have batteries integrated into complex electrical systems. Replacing these batteries may require reprogramming or recalibration of the tractor’s computer systems, which should be done by a professional.
Signs of Major Electrical Failure
If you notice symptoms of a major electrical failure, such as melted wires, burning smells, or visible sparks, stop using the tractor immediately and consult a professional. These issues can be dangerous and may indicate serious problems beyond the charging system.
Remember, while it’s valuable to understand and perform basic maintenance on your tractor, there’s no shame in seeking professional help when needed. A qualified technician can often save you time, money, and frustration in the long run by correctly diagnosing and repairing complex issues.
Choosing the Right Replacement Battery
If you’ve determined that your tractor’s battery needs to be replaced, selecting the right battery is crucial for optimal performance and longevity. Here’s a guide to help you choose the correct replacement battery for your tractor:
Understanding Battery Specifications
Before shopping for a new battery, familiarize yourself with these key specifications:
- Voltage: Most modern tractors use 12-volt batteries, but some older models may use 6-volt systems.
- Cold Cranking Amps (CCA): This measures the battery’s ability to start an engine in cold temperatures. Higher CCA ratings are better for cold climates.
- Reserve Capacity (RC): This indicates how long the battery can run essential systems if the alternator fails.
- Amp-Hour Rating: This measures the battery’s total energy storage capacity.
- Size and Terminal Position: Ensure the battery fits your tractor’s battery compartment and has the correct terminal configuration.
Matching Your Tractor’s Requirements
To find the right battery:
- Consult the Manual: Your tractor’s manual should specify the required battery specifications.
- Check the Old Battery: The current battery (if original) should have the correct specifications.
- Consider Usage: If you use your tractor in extreme conditions, you may want to choose a battery with higher specifications than the minimum required.
Types of Tractor Batteries
There are several types of batteries suitable for tractors:
- Flooded Lead-Acid: Traditional, cost-effective batteries that require regular maintenance.
- Absorbed Glass Mat (AGM): Maintenance-free, spill-proof batteries with good vibration resistance.
- Gel Cell: Similar to AGM, these are maintenance-free and work well in high-temperature environments.
- Lithium-Ion: Expensive but lightweight with a long lifespan and excellent performance.
Factors to Consider When Choosing
- Climate: Choose a battery with an appropriate CCA rating for your climate.
- Maintenance Preferences: If you prefer low maintenance, consider AGM or Gel Cell batteries.
- Usage Patterns: Heavy-duty use may require a battery with higher amp-hour ratings.
- Budget: Balance cost with quality and features that suit your needs.
- Warranty: Look for batteries with good warranty coverage.
Installation Considerations
When installing a new battery:
- Clean the Battery Tray: Remove any corrosion or debris before installing the new battery.
- Check Cable Condition: Replace any damaged or corroded cables.
- Secure the Battery: Ensure it’s properly secured to prevent vibration damage.
- Apply Terminal Protection: Use a terminal protector spray to prevent future corrosion.
Proper Disposal of Old Batteries
Always dispose of old batteries responsibly:
- Recycling Centers: Most auto parts stores and many retailers accept old batteries for recycling.
- Environmental Regulations: Follow local regulations for battery disposal.
- Safety: Handle old batteries carefully to avoid acid spills or short circuits.
By carefully considering these factors and choosing the right replacement battery, you can ensure reliable starting power and optimal performance for your tractor. Remember, investing in a quality battery suited to your specific needs can save you time and money in the long run.
Conclusion
Dealing with a tractor battery that won’t charge can be frustrating, but armed with the knowledge from this comprehensive guide, you’re now well-equipped to diagnose, troubleshoot, and potentially resolve the issue. We’ve covered the fundamentals of tractor battery systems, explored common reasons for charging problems, provided step-by-step diagnostic procedures, and offered detailed troubleshooting steps.
Remember that preventive maintenance is key to avoiding many battery-related issues. Regular checks, proper storage practices, and adhering to a maintenance schedule can significantly extend the life of your tractor’s battery and charging system. However, it’s also important to recognize when a problem is beyond your expertise and to seek professional help when necessary.
When the time comes to replace your tractor’s battery, choosing the right one based on your specific needs and tractor requirements is crucial. Consider factors such as climate, usage patterns, and maintenance preferences to select a battery that will provide reliable service for years to come.
By taking a proactive approach to your tractor’s electrical system maintenance and being prepared to address issues when they arise, you can ensure that your tractor remains a dependable workhorse for all your agricultural or landscaping needs. Keep this guide handy as a reference, and you’ll be well-prepared to keep your tractor’s battery charged and ready for action.
FAQs
- Q: How often should I replace my tractor battery?
A: The lifespan of a tractor battery typically ranges from 3 to 5 years, depending on usage and maintenance. However, it’s best to replace the battery when it shows signs of weakness, such as slow cranking or inability to hold a charge, rather than adhering to a strict timeline. - Q: Can extreme temperatures affect my tractor’s battery charging?
A: Yes, both extremely hot and cold temperatures can impact battery performance and charging. Cold temperatures can reduce a battery’s capacity and make it harder to start the engine, while high temperatures can accelerate internal corrosion and water loss in the electrolyte. Using a battery rated for your climate and properly maintaining it can help mitigate these effects. - Q: Is it normal for a tractor battery to lose charge when not in use?
A: Some self-discharge is normal, especially over long periods. However, excessive discharge when not in use could indicate a parasitic draw or a failing battery. If your tractor sits unused for extended periods, consider using a battery maintainer or disconnecting the negative terminal to preserve charge. - Q: Can I jump-start my tractor with a car battery?
A: While it’s possible to jump-start a tractor with a car battery, it’s not always recommended. Tractors often have different electrical systems and voltage requirements. If you must jump-start your tractor, ensure both batteries have the same voltage (usually 12V) and follow proper safety procedures. It’s generally safer to use a dedicated tractor battery charger or jumper pack. - Q: How can I tell if my tractor’s alternator is failing?
A: Signs of a failing alternator include dimming or flickering lights, a battery warning light on the dashboard, a weak or dead battery despite recent charging, strange noises from the alternator area, and electrical accessories working poorly or intermittently. If you suspect alternator issues, have it tested by a professional to confirm.
Remember, while these FAQs provide general guidance, always consult your tractor’s manual for model-specific information and recommendations. If you’re unsure about any aspect of your tractor’s electrical system, it’s best to consult with a qualified technician to ensure safe and proper maintenance or repair.